
How to Put in Clip in Hair Extensions Like a Pro

Clip-in hair extensions are a great option for anyone who wants to quickly add length and volume to their hair. The best part is that they’re super easy to use. At Unihairvn, we’ve got you covered with everything you need to know, from picking the perfect set of clip-ins to step-by-step guide on how to put in clip in hair extensions.
What are Clip In Hair Extensions?

Before getting to know how to put in clip in hair extensions, let’s see what clip in hair extensions are.
Clip-in hair extensions are made from wefts of hair that are sewn or bonded onto a slim, discreet seam with small metal snap clips attached, ready to be clipped into your natural hair.
They’re a fast and temporary way to add both length and volume without committing to more permanent methods. Thanks to the small, subtle clips at the base, clip-ins are super easy to put in and take out, often in just a few minutes.
Available in a wide range of thicknesses, weights, lengths, colors, and seam materials, clip-in extensions can be tailored to suit every hair type and styling need.
Unlike sew-ins or tape-ins, clip-in extensions don’t require a salon visit or professional help. They’re perfect for anyone who likes to change up their look without the hassle.
Benefits of Clip In Hair Extensions

Clip-in hair extensions have become a go-to option for many women and for good reason. One of their biggest advantages is versatility. With clip-ins, you can switch up your hairstyle anytime you like, whether you’re going for extra volume, added length, or a new look altogether.
They’re also an affordable alternative to permanent extensions. While salon-installed extensions can be costly, clip-ins offer a more budget-friendly solution without sacrificing style. You’ll find them made from either human hair for a natural blend or high-quality synthetic fibers.
Another major perk? They’re gentle on your natural hair. Since clip-ins don’t rely on glue, heat, or harsh application methods, they won’t cause damage.
You can easily install and remove them without compromising the health of your hair, giving you the flexibility to maintain your natural hair routine with ease.
Types of Clip-In Extensions
Before mastering how to put in clip in hair extensions, it’s important to choose the right type for your hair type, lifestyle, and styling needs. Not all clip-ins are created equal — here’s a quick overview of the most popular types you’ll find on the market:
Classic Clip-In Extensions

Classic clip-in extensions are the most popular type, typically available in sets of 5–9 wefts in different widths. Each weft features small, pressure-sensitive clips sewn onto a durable fabric base, allowing for secure attachment without damaging natural hair. Ideal for adding instant length, volume, or highlights for everyday use or special occasions.
- Pros: Easy to apply and remove; reusable; budget-friendly.
- Cons: May feel bulky for those with thin hair; clips can become visible if not installed correctly. The fabric backing can feel slightly thick, which may cause some heaviness if worn for extended periods.
- Best for: Beginners, everyday use, or special events.
- Tip: Blend with layers for a seamless finish.
Seamless (Silicone/PU) Clip-Ins

Seamless clip-ins feature a thin, flat silicone or polyurethane base instead of the traditional fabric track. This allows the wefts to lie flatter against the scalp, making them more discreet and lightweight — ideal for finer hair types.
- Pros: Compared to fabric clip-ins, glue clip-ins are thinner, hug the head, creating a light and comfortable feeling when worn, no fabric edges, less visible clip legs.
- Cons: Slightly more expensive than classic clip-ins.
- Best for: Fine or thin hair; users seeking a more natural finish.
- Tip: Choose a color that closely matches your roots for a flawless look.
Zig-Zac Clip-Ins

Zigzag clip-in hair extensions are a unique type of one-piece extension designed with a zigzag-shaped base that follows the natural curve of the head. Unlike traditional straight wefts, the zigzag structure allows for better grip, seamless blending, and more even hair distribution across the scalp.
- Pros: Easy to apply, natural fit, lightweight feel.
- Cons: Limited styling, not ideal for layered looks.
- Best for: Quick volume and beginner-friendly use.
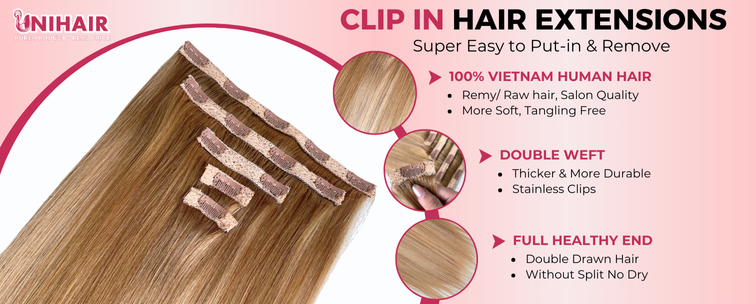
Double Weft Clip-Ins
Double weft extensions are made by stitching two wefts together on each clip section, offering extra density and volume without adding bulk. They are ideal for people with naturally thick hair who want a fuller transformation.
- Best for: Medium to thick natural hair
- Pros: Adds more volume with fewer pieces, fuller look
- Tip: Use fewer sections for a natural look or all wefts for full glam
Each type serves a different purpose, so understanding your hair goals and comfort level will make all the difference when choosing the best option for your look.
How to Prepare Your Natural Hair For Clip In Extensions
If you’re wondering how to put in clip in hair extensions, you’re not alone. Clip-ins are one of the easiest and most popular ways to add instant volume, length, and style — no salon visit required. Whether you’re a beginner or looking to improve your technique, this guide will walk you through every step for a flawless, natural look.
Preparing your hair properly is the secret to getting your clip-in extensions to blend beautifully and stay secure all day long. Here’s a simple guide to create the ideal base for flawless application.
Step 1: Clean and dry your hair
Always wash your hair and completely dry it first. Clean hair provides a better grip for the clips, helping them stay in place.
Skip any heavy conditioners or leave-in products, they can make your hair too silky, causing the clips to slip. If your hair needs moisture, opt for a lightweight conditioner and rinse it out thoroughly.
Step 2: Brush out tangles
Use a wide-tooth comb or a detangling brush to smooth out any knots. This not only makes the application easier but also helps protect your natural hair from breakage. Start at the ends of your hair and gently comb up to the roots.
Step 3: Section like a pro
One of the most important steps in how to put in clip in hair extensions is parting your hair properly. Use a tail comb to create horizontal sections, starting at the nape of your neck and working your way up. Clip the top sections away as you apply each weft.
Step 4: Match your hair’s texture and tone
For a seamless finish, make sure your extensions match the color and texture of your natural hair. You can style your clip-ins before putting them in, whether that’s curling, straightening, or adding waves, so they blend in perfectly once applied.
By taking a little time to prep, you’ll ensure your clip-ins stay put and look completely natural, giving you confidence and flawless results every time. Read on to find out how to apply clip in hair extensions.
Step-by-Step: How to Put in Clip In Hair Extensions Naturally

Knowing how to use clip in hair extensions correctly is the key to achieving a natural, polished finish that blends perfectly with your own hair. Follow these simple, expert-approved steps for how to put in clip in hair extensions.
Step 1: Start at the bottom
The first step in how to put in clip in hair extensions is sectioning. Begin by separating the top half of your hair and clipping it up. This will reveal the lower section near the nape of your neck, where you’ll place your first weft.
Choose a medium or large piece and clip it in close to the roots, making sure the clips are evenly spaced and feel secure but comfortable.
Step 2: Build layers as you go
Keep sectioning and moving upward to the crown of your head. Use the larger wefts through the middle to add volume and body.
As you get closer to your temples, switch to smaller pieces for a more natural blend along the sides. For those with fine hair, gently backcomb the roots where the clips will go to help them stay in place.
Step 3: Blend everything together
Once all your extensions are in, let the top section of your hair down. Use a wide-tooth comb, your fingers, or a soft-bristle brush to blend your natural hair with the extensions gently. Lightly tousling with your hands can also help everything mix together seamlessly.
Step 4: Style to match
To finish, style your hair and extensions together for a uniform look. Whether you’re curling, waving, or straightening, be sure to use a heat protectant, especially if your extensions are made from real human hair. Matching the textures will make the extensions virtually invisible.
Now that you know how to put in clip in hair extensions, you can enjoy salon-worthy results at home — anytime. With a little practice, applying clip-ins becomes fast, easy, and part of your beauty routine. Whether it’s for everyday wear or a special occasion, clip-ins are the perfect tool for instant hair transformation.
Common Clip-In Extension Mistakes

Learning how to put in clip in hair extensions can transform your look — but only if done correctly. Even the highest-quality clip-ins can appear bulky or unnatural if applied the wrong way. To help you achieve that seamless, salon-quality finish, here are some of the most common mistakes to avoid:
Overloading with too many wefts
It’s easy to assume that more wefts mean more volume but piling on too many can actually make your hair look bulky and unnatural. Start with just a few pieces and build up as needed, focusing on balance and blend instead of sheer volume.
Clipping too close to the scalp
Clipping the extensions too tightly against your scalp can lead to discomfort and even hair breakage. Leave a bit of space between the roots and the clip to allow for a secure, yet flexible hold. This helps the extensions sit more naturally and avoids unnecessary tension.
Skipping the sectioning process
Throwing in wefts without proper sectioning can cause uneven layers, bumps, and a disorganized look.
Instead, take a few extra minutes to part your hair horizontally, starting at the nape and working your way up. This creates a smooth, natural layer effect that blends beautifully.
Forgetting to style after application
Installing clip-ins isn’t the last step – styling is key. Extensions will stand out if they’re not blended properly. After clipping them in, use heat tools or your favorite styling method to match the texture of your natural hair.
Whether you curl, straighten, or wave, styling both your hair and the extensions together helps everything blend effortlessly.
Not checking the back
Your front view might look flawless, but the back could be giving away your secret. Always use a handheld mirror to check the rear view, or ask a friend to snap a quick photo.
This quick step ensures that no wefts are exposed and that your hairstyle looks polished from every angle.
By avoiding these common pitfalls and taking a little extra time with your application, you’ll enjoy a seamless, natural-looking finish every time you wear your clip-ins.
Conclusion
Clip-in extensions are a quick and convenient way to add instant length, volume, and a touch of glam without the long-term commitment of permanent options. Whether you’re going for a subtle boost or a dramatic transformation, these versatile pieces make it easy to change up your style in minutes.
So whether you’re aiming for an everyday, laid-back vibe or a full-on glam moment, clip-ins give you the freedom to refresh your look whenever the mood strikes. Above is everything about how to put in clip in hair extensions and related things that you should know. Hopefully, you can choose the best type for your hair now.


